How to organize home and store items
- Blue Eden Project
- Sep 8, 2022
- 23 min read
Updated: Oct 27, 2022

Key Points:
A clutter-free home is beneficial to your mental and social health. It may look easy, but there are many areas that could be overlooked. We are trying to put together a comprehensive guide to help you organize your home in a best way.
WikiHow has many articles talking about organizing home, but each standalone article can't form a solid and comprehensive solution. Therefore, we have rewritten and integrated several articles together to create a better version.
Home is very important for us, and is the foundation of our life. How to keep it clean, clutter-free and comfy is of vital importance to a better life.
Here we quote the best way to "organize home and store items" provided by wikiHow, a wiki that is building the world's largest and highest quality how-to manual. Please edit the articles and find author credits at the original wikiHow articles on How to Create a Minimalist Home, How to Organize Your Room, How to Organize a Living Room, How to Organize Your Bedroom, How to Organize a Kitchen, How to Organize Your Garage, How to Organize Skin Care Products, How to Organize Craft Supplies. Content on wikiHow can be shared under a Creative Commons License.
There are different functional rooms in our home. The most necessary rooms include: living room (relax and entertain guests), kitchen (make and eat food), bedroom (sleep), bathroom (toilet, wash hands, brush teeth, take a bath, or take a shower). There could be additional rooms that are good to have: family room (separated from living room, only for family enjoyment), dining room (separated from kitchen, only for eating), study room (for learning and reading), storage room (store items). Houses may have or need additional rooms than apartments: entrance hall or foyer (for shoes, coats, umbrella, etc.), laundry room (wash and dry clothes), exercise room (for exercise), garage (vehicle, tools and accessories), basement (can be updated to a game room or home theater).
One primary principle for an organized home is that all items should be put into their specific functional rooms in an organized way. It will be much easier to find and use those items.
Part 1: Create a Minimalist Home
Minimalism isn’t just a personal aesthetic choice—it’s a streamlined, organized, and refreshing way to reorganize your home so you’re only holding onto the essentials.
1. Simplify your home one room at a time.
Break things down so you don’t have so much to do at once. Creating a minimalist house or apartment is a really big undertaking, and it’s understandable if you’re feeling a bit overwhelmed. Take a deep breath, and focus on 1 room a time. There’s no deadline for reorganizing your home, so give yourself as much time as you need to get your home exactly the way you’d like it.
Take all of your belongings out of their current locations. This may seem painful and like you're creating a bigger mess, but if you really want to organize your room, you have to start from scratch. Though you may be overwhelmed by the giant pile of stuff you've created on your floor, desk, or bed, rest assured that you'll find the right place for everything soon enough.
Organize your belongings. Before you begin to figure out where everything should go, you should get a number of boxes and label them for different purposes. Crates or plastic bins will work just as well, but boxes are best because you can just recycle them when you're done organizing and won't have to deal with more clutter. Label them Keep, Store, Donate, and Trash. Here's how you should label the boxes:
Keep. The items that you keep will be items that you use on a regular basis. If you've used the item in the last two or three months, you should keep it.
Store. These are things that you can't bear to throw away, such as something with sentimental value, but which you rarely use. You can also store away a large portion of your clothes that you won't wear until the next season or two. If it's the middle of the summer, you can store your winter sweaters, and if it's the dead of winter, you can store your summer dresses.
Donate. These are items that may benefit someone or could be sold, but which you don't need any more. You may have a nice sweater that you don't fit into anymore that you can donate, or an old textbook that you can sell.
Trash. These are items that no one needs -- including you. If you have to spend time wondering what something is, or when the last time you even saw it was, or even if you forgot you ever owned something, it's time to toss it.
2. Get rid of anything you don’t need. (Trash box)
Start with the biggest items and work your way down. Look at each piece of furniture, and ask yourself if you really need it or not. Then, work your way down to smaller items, like household appliances, pieces of decor, books, and other personal belongings. See if your home really needs the item, or if it’s just taking up space—this can really help narrow things down.
3. Discard any duplicates. (Trash box)
Donate or toss out any extra items that you don’t need. Look through your drawers and cabinets to see if you have any duplicate items lying around, like measuring cups, extra silverware, throw pillows, blankets, extra cosmetics, and more. Ask yourself if you’re using these extra objects frequently—if the answer is no, then it’s probably safe to throw them out.
4. Donate your items regularly. (Donate box)
Sort your belongings once a season and donate some of them to charity. Set a time during the year to go through all of your things, whether it’s clothing, kitchen tools, books, or anything else. If you don’t actively use the item any more, set it aside in a donation pile.
5. Hide any unused items in storage. (Storage box)
Keep everything out of sight unless you’re actively using it. Find a place in your home for all of your leftover items, whether it’s a cabinet, dresser, ottoman, or some other form of storage. Choose an assigned space for every item in your home, so you can remember where everything goes in the future.
6. Opt for just a few meaningful decorations or accents.
Decorate with a few accents you really love, then get rid of the rest. Chances are, you don’t need dozens of pictures or pieces of art hanging up on your wall or cluttering up your counters and surfaces. Look through each decoration—does this art, photo, or decor item hold a lot of personal value, or is it just taking up space? Focus on the decorations and accents that really add a personal touch to your home, instead of hanging up random paintings and photographs.
7. Invest in multi-purpose furniture.
Look for furniture that can do at least 2 things at once. Minimalism is all about streamlining your space. Shop for pieces of furniture that really help make the most of your home. Fill your rooms with furniture that double as storage, or serve another useful purpose.
8. Clean your home often.
Try to clean up clutter as soon as you notice it. Get in the habit of putting everything away as soon as you’re done with it, so your home can be really clean, open, and streamlined. Set aside a few minutes every night to clean off the surfaces of your home, so it doesn’t start to stack up.
Part 2: Reorganize Your Living Room
You probably spend a lot of time in your living room, and it's usually the first place most guests see. You likely want your space to look amazing, and organizing it might help. While it's normal for living rooms to get messy sometimes, you'll be able to keep it clean and tidy more easily if it's organized. Fortunately, organizing your living room is usually a quick and easy process.
1. Arranging Your Furniture
Choose a focal point for your room that reflects your personal tastes. Picking a focal point will help you better enjoy your room. Plus, it’s easiest to organize your furniture around a focal point, and it also helps you create a more stylish look. To help you pick a focal point, decide how you most often use your living room. Here are some common focal points for a living room:
Your TV
A fireplace
A large piece of art
A gallery wall
Position your furniture around your focal point. You should be able to see your focal point from any of your living room seating. Start by placing your sofa where it looks best. Then, add your love seat or additional seating, depending on what you own. Move the items around until you’re happy with how they look.
Lay down any rugs you’re incorporating into your decor. An attractive rug can add style to your living room, and it may also provide a comfortable space to play on the floor. Pick a large rug to make your room look bigger. Place the front legs of your sofa and chairs on the rug if possible to bring the look together.
Position your coffee table and side tables if you have some. Once you know where your sofa and chairs will go, put your coffee table in the center of the seating area. Then, place your side tables next to your seating area. Walk around the area to make sure you can pass between the furniture pieces.
Set up any floor and table lamps you’re using for extra lighting. You may not need any lamps in your living room. However, they can really brighten up your space and may add to your style aesthetic. Position floor lamps in corners or near your furniture. If you have any table lamps, put them on your side tables.
Hide your electronics cords if they’re visible. While there's no harm in having cords visible, they may be an eyesore for you if they're very noticeable. Conceal the cords behind a large piece of furniture or inside your wall if possible. Otherwise, hide your cords in a decorative basket on the floor or on a shelf. As another option, you could cover them with cloth or twine.
2. Organizing Decorations and Small Items
Purchase any organizational items you need. You may not need to buy any storage items, so don’t worry about this if you don’t have extra items to store. However, you might want extra storage for things like blankets, books, magazines, and toys. Choose storage items that fit your personal style. Here are some ideas:
Get stylish baskets or bins for storage on shelves or on the floor.
Buy an ottoman or coffee table that has extra storage.
Install new shelving on the walls.
Get a bookshelf to store books and display your belongings.
Place books or photo albums on a shelf. Your living room is a great place to display your books. Additionally, you might like to keep your photo albums handy in case you want to flip through them. Arrange these items on a bookshelf or floating shelf.
Decorate your shelves with small items like vases, figurines, and photos. Decorative items let you show off your personality and help create a feeling of home. Gather the items you plan to display in your living room. Then, find a great spot for each item.
Place a potted plant, framed art, books, or vase on your tables. You might like to decorate your tables, though this isn't necessary. Choose a centerpiece like a plant or vase for your table. Alternatively, you might keep it simple with a framed print.
Limit what you put on shelves and tables so they aren’t cluttered. Displaying your personal items is a great way to show off your sense of style, but sometimes less is more. If you put out too many decorative items, your space may look disorganized even though you work hard to keep it tidy. Step back after you add each item to make sure the space isn't becoming cluttered.
Use a container or tray to hold items like remotes or phone chargers. You likely have items you want to keep handy, and creating a special spot for these things is both convenient and tidy. Place a small decorative tray on your coffee table or side table for an easy option. You might also hang a remote control holder over the arm of your sofa if you prefer. Keep your remotes and small items you use often, such as phone chargers, in this container.
Place magazines in a storage basket. Magazines are fun to read, but they can easily create unwanted clutter in your living room. Keep your magazines organized using a small basket. Stack the magazines in the basket or line them up, depending on the style of basket you're using. Place the basket near your seating area or under a table.
Put your DVDs in your media stand or in a bin or basket. While streaming services are popular, you might still enjoy collecting your favorite movies and shows on DVD. Like any small item, DVDs can create clutter in your living room. Keep them out of sight by arranging them on a shelf in your media stand if possible. If you don't have a media stand or yours doesn't have storage, put your DVDs in decorative bins or baskets.
Designate a catch-all bin to collect miscellaneous clutter. If you’re like most people, your living room probably collects random items from around your home, which can leave it looking messy. Try not to stress out about your day-to-day clutter. Instead, place a cute storage container in your living room where you can collect these items.
Part 3: Reorganize Your Kitchen
A disorganized kitchen can be a big headache! Being able to quickly and easily find the items you need can save you time and unnecessary stress. Before you start organizing your kitchen, sort your belongings according to use. Next, arrange your countertops and organize your cabinets and drawers. Finally, you can create extra storage space if you need it.
1. Sorting Your Belongings
Create activity zones based on how you use your kitchen. Knowing how you'll use your kitchen makes it easier to decide where to keep your items. Here are some zones you might incorporate:
Coffee or Tea Spot: Place your coffee pot or tea pot in an easy-to-reach location. Store your mugs and coffee or tea nearby.
Food Prep Station: Provide space to prepare your dishes. Place your cutting board, knives, measuring cups, and related items near this space.
Cooking Station: You’ll likely center this area around your stove. Keep your cooking utensils nearby, as well as your oven mitt.
Serving Station: If you have space, you might include a spot for serving your food. Choose an empty countertop, and keep your serving spoons nearby.
Choose easy-to-reach places for your most frequently used items. These items should be easy to take out, use, wash, and replace. Keep them at eye or waist-level near your dishwasher, sink, or stove. Don’t stack items like pots and pans if that means you have to dig to find what you want.
For example, you might put the dishes you use daily in an eye-level cabinet close to the stove.
Group similar items together. For instance, your categories might include mugs, pots, dinnerware, and storage containers. Storing these items in the same spot will make it easier for you to find and grab what you need.
2. Arranging Your Countertops
Keep rarely used items off your countertops. Place items you don’t use often inside your cabinets or store them outside your kitchen if you’re short on space. Only store items you frequently use on the countertop. This makes it easier for you to work in your kitchen every day.
For example, you might keep your microwave on the counter if you use it daily, but put away your toaster if you only use it once a week.
If you’re short on cabinet space, place any decorative items you’d like to display in your kitchen in an out-of-the-way location, such as on top of your cabinets. Don’t clutter your cabinets and countertops with decorations.
Place commonly used appliances and kitchenware on the counter. Designate which areas need to remain empty, such as your food prep area. Then, find a spot for items you use daily, such as your microwave, coffee pot, dish rack, and cutting board.
Make sure you know where your power sockets are before you decide where to place your items. You’ll need to put your appliances in a place where they can be plugged in.
Keep your most used kitchen utensils in a jar near the stove. This includes items like your stirring spoon, spatula, spaghetti server, and slotted spoon. Only place items you use often in your utensil jar. Store items you rarely use but want to keep in a utensil drawer.
A large jar or canister works great for storing your utensils. As another option, you can use a clean vase.

Install a magnetic strip to hang your knives. Keep only the knives you actually use, such as your chopping and paring knives. Let go of your extra knives and knife block, which can take up too much space on your countertop.
If you have knives you use occasionally, store them in a drawer.
Donate your unused knives and knife block.
Put a small shelf by your sink for your hand soap and sponges. A tray gives you more space around your sink. Place your soap, dish sponge, and towel on the tray. Then, place your sink stopper and bottle scrubber below the shelf.
Keep items like cooking oil and honey on a dish or tray. It's normal for your oil or honey to drip, making your bottle sticky. This can gum up your cabinet or countertop and make your other items sticky! Place your oil on a small dish or tray that you can wash often.
3. Organizing Cabinets and Drawers
Designate each cabinet and drawer for a specific item or items. Then, arrange your items in the cabinets and drawers. Place the items you use often near the front of your cabinets to make them easy to reach. This makes it easier to store similar items together so you can quickly find what you want.
For example, you might designate a large cabinet for your dishware, a small cabinet for mugs, a bottom cabinet for pots and pans, etc.
You might have one drawer for towels and pot holders, one drawer for utensils, and one drawer for extra cooking tools.

Keep your cleaning supplies under your sink. It’s easy to forget about the cabinet under your sink, but it’s the perfect place to store your kitchen cleaners. Keep your cleaning wipes, sprays, soaps, and sponges under the sink.
If you need more storage space, install a shelf or decorative baskets under your sink.
Use trays with compartments to organize the contents of your drawers. Choose a tray that is the same size of your drawer or smaller. You can place your items in the tray and in the space around it, depending on what you’re keeping in the drawer. This lets you organize your utensils, measuring cups, chip clips, and other items.
You can use a tray with multiple compartments or several small trays with just one compartment. Choose the solution that works best for you.
Arrange items on small, easy to remove trays to keep cabinets straight. Trays are a great solution to easily access the back of your cabinets without digging. Choose smaller trays so they are easy to remove and replace as you need items.
For instance, you might use trays in your top cabinets so that the items you’ve stored in the back of your cabinets are still accessible.
Put pantry items in clear bins to make them easy to find. Empty your foods into food storage containers to cut down on clutter and keep the pantry organized. Pour foods like cereals, grains, and baking supplies into stackable containers. Then, arrange them neatly in your pantry.
Group your foods into categories. For example, stack your cereals together, your pasta noodles together, and your baking supplies together.

Use a file sorter or magazine holder for items like lids or baking sheets. Put the file sorter or magazine holder inside your cabinet, then put your lids or baking sheets into it. This allows you to store the items upright, keeping your cabinets uncluttered and your items within easy reach.
Choose a sturdy metal file sorter so it’ll stay upright.
Both plastic and metal magazine holders will work well for your kitchen storage.
Place items on a lazy susan to avoid digging for the thing you need. A lazy susan spins, allowing you to have easy access to all of the items it contains. They come in several different sizes. You can put a lazy susan in your cabinet or pantry to store spices, canned goods, or other items.
A small lazy susan works great for spices, while a larger lazy susan might be a great option for canned goods.
Keep your junk drawer clean with small, lidded containers. If you have a junk drawer, maximize its use by keeping your items sorted into smaller containers. Label the containers so you know what’s inside them.
Go through your drawer regularly and get rid of the items you aren’t using.

4. Filling Your Refrigerator
Place ready to eat foods and drinks on your top shelf. This includes pre-packaged foods, eggs, and leftovers. The top shelf is easiest to access. Plus, storing these items at the top of the refrigerator helps prevent contamination because no foods are placed above them.
Store drinks that are too tall for the top shelf on the middle shelf of your refrigerator. Avoid storing them on the door, where it's warmer.

Keep your raw meats on the lower shelf of your refrigerator. This prevents them from leaking onto your other ingredients and contaminating them. However, check over your meats to make sure they aren't leaking before you store them, as they can spread bacteria. If you find a leak, repackage your meat and clean up the spill using an antibacterial cleaner.
Protect your crisper by placing your meats in a plastic container that fits on your lower shelf. If the meat leaks, it'll leak into the container, not onto your produce.

Put raw produce on the middle shelf or in the crisper. Keeping your produce on the middle shelf makes it easier to pull it out when you're ready to cook. Plus, this keeps it above the meat in your refrigerator. However, your crisper can control humidity and provide the best environment for your fruits and vegetables, so you might prefer to keep them there.

Keep your condiments on the door of your refrigerator. The door is the warmest part of your refrigerator, so the only safe thing to store there is your condiments. Group them according to type so it's easy to find what you need.
For example, put jams and jellies together, group marinades together, and put all of your sandwich dressings in one spot.

Put your cheese and lunch meats in the cheese drawer. Most refrigerators have a small drawer below the top shelf where you traditionally store cheese. If you buy sandwich meats, you can also place those in the cheese drawer. This keeps your cheeses safe and easy to find.

Part 4: Reorganize Your Bedroom
When piles of stuff start taking over your bedroom, it's time to put the mess back in its place. Having a disorganized bedroom isn't just unpleasant — it can actually have a noticeable effect on your mood. Clutter and disorder are known to trigger feelings of stress and sometimes even depression. Luckily, the solution is simple — get your room organized and under control!
1. Divide your storage spaces into organized sections. Sort the items on shelves and in your closet by grouping them in it into neat, tidy piles. Not only will this it look less cluttered, but it will also be an efficient use of limited space on your shelves or in your closet.
Organize your clothes by season. Keep the summer, spring, winter, and fall clothes on the same part of the closet.
Hang up as many of the clothes as you can while still maintaining space between your garments to create order. Try organizing them by the type of garment they are. For example, when you hang up your summer clothes, keep tank tops, t-shirts, and dresses separated.
Make use of the space below your clothes. If you've hung up your clothes, you should still have a few feet of space below them, so don't waste it. Use the space for a storage bin.
Add shoe storage like shoe racks, shoe cubbies or hanging shoe organizers.
Add closet storage like plastic bins, woven baskets, or even milk crates for out of season items or small items like socks, undergarments, and scarves.
Add hooks on the wall to hang up bags and belts so they are not lying in a pile on the floor.
2. Organize your dresser. Your dresser is the place where you store your additional clothes or accessories, so it should be as neat as possible to prevent you from turning it upside down every time you search for another piece of clothing. Here's how to organize your dresser:
Organize the top of your dresser. Take all the clutter from the top of your dresser and put it in a plastic bin at the corner of the dresser. If there's a better place for the clutter, like your bathroom, desk, or top drawer, put it there. If you find stuff that's better off in someone else's hands, donate it or sell it.
Find a good use for your top dresser drawer. Don't just use the top drawer to throw in everything that doesn't have a good place. Decide what this use will be and stick to it.
Organize the rest of your drawers. Create a drawer for your underwear, a drawer for your pajamas, a drawer for your athletic gear if you work out a lot, and then one or two drawers for the tops and bottoms you wear every day. Keep your tops and bottoms separate so you know where to find everything.
3. Create a charging station in your room for all your electronics. Place small electronics like your phone, your iPod, and your camera together in one place in your room, as well as their chargers.
You can also purchase a multi-device charging station to keep your chords from getting tangled and disorganized.
4. Label your storage areas. If you keep forgetting where to put your possessions once you've cleaned up your room or you're having a hard time sticking to your approach to cleanliness, labeling your storage areas will help you know exactly where things go.
5. Utilize unconventional storage spaces. Keeping your room clean isn't just about shoving your belongings into your closet! There are other ways to keep your room clean and organized that fall outside your closet, such as:
Sliding baskets or bins under your bed for linens, blankets, and towels.
Making space for items on wall shelves like small pictures or figurines.
Part 5: Reorganize Your Bathroom
There are not many items in the bathroom. The most commonly used items are personal care products, such as lotions, serums, etc. You can use individual bins to keep your items organized; once you categorize all of your products, designate 1 bin for each product type. Or, you can select a Lazy Susan organizer to easily locate your products. A Lazy Susan is a turntable usually made out of wood, glass, or plastic. Place the Lazy Susan on a shelf or in a cabinet, and stack your products on top. Then, spin the turntable to easily access any product you’d like.
1. Pick a general location in your bathroom for all of your products. The location of your products will depend on your living arrangement and current storage options. Housing all of your products in the same place keeps them organized, so you can easily use them when you need to.
2. Pick a handy spot near a mirror to house items you use daily. When getting ready in the morning, you want to easily reach your daily items. Pick a spot for your daily face wash, toner, moisturizer, acne treatment cream, body lotion, or any other products.
3. Choose a particular shelf for each type of product. When organizing your products, put each product type in its own home. This includes all of your serums and oils, hand lotion, body lotion, body butter, facial scrubs, and so on. Designate a particular shelf or cabinet for each of type of product, and place your storage solution in that spot.
Part 6: Reorganize Your Garage
For many people, the garage is more than just a place for parking a car. If you're in the habit of using your garage for tool store, a safe space for snow skis, or as an over-flow attic, things can get out of control quickly. Fortunately, you can learn to address the mess, get the proper organization tools for the job, and choose a method of organization that works best for the stuff you've got.
1. Getting the Right Storage Gear
Choose visible storage for frequently-used items. One of the easiest ways to maximize the space in your garage is to get items like storage hooks and wire baskets, which can be mounted onto the walls wherever it's convenient for your access. You will also need some brackets to secure these storage items into place. The best part is that they can easily be customized to fit the specific layout of your garage, they won't collect dust and they can be moved if necessary. These types of storage hangers are great for common-use items, as well as bulky or unusual items like:
Snow skis
Bicycles
Tennis rackets
Leaf blowers
Rakes
Hoses
Rope
Buy some plastic storage tubs. For sporting goods, seasonal decorations, and other loose stuff that needs to be grouped together, buying some plastic tubs can be a great way of organizing. Go with clear plastic to make sure you can see everything that's inside without having to dig around.
Hang some new shelving units. If space is at a premium, consider installing some shelves, or buying some pre-fab shelving units so you can increase the storage space in your garage.
Consider some standing tool chests. If you're a big tool collector, consider investing in a tool chest, or some more substantial tool boxes to help keep your collection organized and arranged properly. Rolling tool chests are excellent ways to keep your automotive, yard, and home repair tools clean and available when you need them.
2. Getting Organized
Separate all the items according to their purpose. Categorize your items in terms of use and separate them appropriately. For instance, you could place recreational gear like skateboards, roller blades and golf clubs in one area. You could then put your tools, power saws and blades in another. Once you have everything sorted out, you can decide the best way to arrange them for easy access.
Consider storing items according to the most frequently used. Put the stuff you don't use often toward the back, or the more difficult to reach spaces of the garage. If you hardly ever go golfing, you would want to place your clubs behind other things that you use more often, like the lawn mower or your socket wrenches.
Consider organizing items seasonally. You may also want to make seasonal adjustments in your garage, so you can rotate summer and winter items accordingly. You probably won't need your snow blower during the heat of summer, so you can schedule yearly reorganizations to keep your space in the most optimum arrangement for the season. It doesn't need to take more than a few minutes.
Label everything clearly. Finally, you can prevent a lot of frustration by properly labeling storage bins or anything that you have to open to access items. If you have small items like different sized screws and nails, you should put these into small containers and mark them accordingly. It may be a little more tedious at first, but should make your life easier later on.
Part 7: Reorganize Your Other Rooms
1. Study room or other rooms with a desk
Organize your desk. If you have a desk in your room, you should keep it as organized as possible. Come up with a game plan for separating and organizing all of your important items so you avoid a mess in the future. Here's how to do it:
Designate a place for your scissors, staplers, and other office supplies. This could be an area on the corner of your desk or your top drawer. It should be easily accessible since you'll use these items often. Remind yourself to keep all of the desk things on the desk. If you use the stapler, return it to the desk, or it may get lost among the other clutter in the rest of your house.
Designate a place for your writing utensils. Have a cup or small case for keeping your writing utensils so you no longer have to spend fifteen minutes looking for a pen. As you do this, go through your utensils to make sure that all of them work. Toss out the ones that can barely write a simple sentence.
Create a filing system for organizing your papers. Create folders or drawers designated for different tasks. One drawer could be used for important papers that you don't use often. Another drawer or folder could be designated for papers for a certain subject or aspect of your life. Don't mix the papers up, or you'll have a hard time finding things.
Minimize the clutter on the surface of your desk. Try to keep the photos and mementos on your desk at a minimum to give yourself more room to work, keep your computer, or other things.
2. Family room is similar to living room.
3. Storage room is quite straight forward. Just put unused items into different categorized boxes.
4. Entrance hall or foyer, laundry room, exercise room, game room and home theater are much simpler. Only keep the items related to those functional rooms.
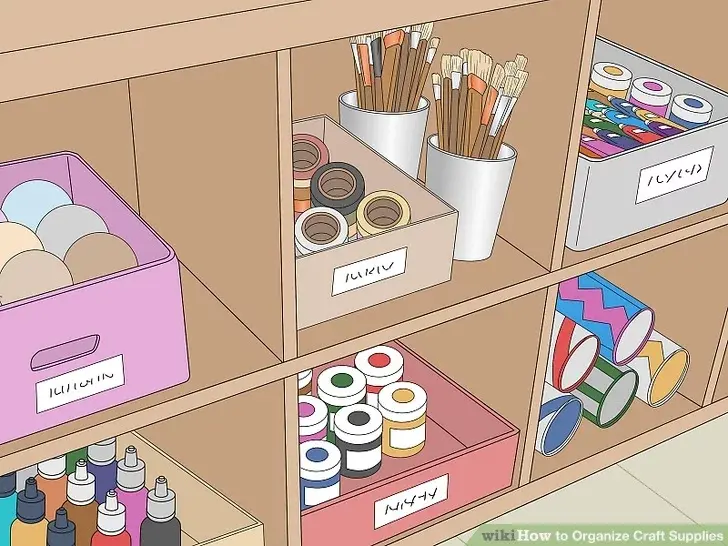
5. Organize Craft Supplies
If you're crafty and like to make things, chances are the materials and supplies that go into your hobbies have stacked up over time, and not in a tidy way. Here's how to regain a bit of control and find what you need, when you need it.
Locate all of the craft supplies that you own.
Sort out all of the supplies that you have into smaller groups.
Sort by item type. Put glue sticks, bottles, and jars into one pile. Put decorative stickers into a different pile. Put fancy paper into a pile of its own.
Better yet, sort by activity. Have one kit, bag, bin, or space for painting, one for paper crafts, one for yarn, knitting needles,
Choose where to store your supplies. Think about where and how you do crafts. If you have a craft area already, add drawers, bins, or shelves. If you knit in front of the TV, your organization may consist of a knitting basket or two with active projects that live by the sofa and a bin full of extra yarn and inactive supplies stashed away in a closet elsewhere.
Try a drawer organizer or even a fishing tackle box to corral many small items. Something with multiple smaller spaces helps separate little stuff.
If you have a lot of small items, like beads or buttons, giving each group its own small container or compartment that seals or closes tight can save spills.
Do you craft on the go? A tote bag or even a purse-sized craft kit might be just the right organization system for you. Keep a project at hand when you go out to make use of wait times.
Keep on sorting.
Sort a little bit whenever you start or finish a project or get new supplies.
Rearrange if you notice something isn't working. If it's not where you looked for it, put it back where you will look for it next time. If it's not handy and you use it often, put it back near the top or closer to where you work.
Arrange by size and shape so that things are visible and accessible. It's best if you don't have to empty an entire bin to get out one item.
Put the flat objects into the container first, standing up on one side if possible, and then place the non-flat objects on top of them or alongside. Put frequently used items near the top.
For materials, like paper or fabric, try a filing system that displays them. Stand them on edge in a bin or drawer so that you can sort through them and see at a glance what you have. Smaller pieces might be rolled and stood up in a basket or bin.
Label with tape or paper what is in each container. Don't rely on sticky notes or anything else that could fall off too easily. For example, if a certain container holds glue, markers, and crayons, write that out and attach that to the container. This way, you will know what is in the container when you need to get something out of it in the future.


Comments